Saturday, December 31, 2011

Good Bye 2011


The 2011 Holiday Season has come and gone and it was another great one for this family.  It was a lot of fun for us to watch our son open his gifts this year.  This Christmas he understood the concept of Santa, which was nice because I pulled the "I'll call Santa" card a few times this month when he was being naughty.  I'm not going to remove Santa from speed dial quite yet.

I make our Christmas Card each year (of course) and since having our son, I've incorporated photos into the card design.  Here are some photos of this years card.


 My cards went out much later this year than I would have liked but I like how they turned out.  I wanted to combine my new hobby (sewing) with my old hobby (stamping).  I had a heck of a time finding pictures for this card out of the several dozen that were taken, apparently three year olds don't like to look at the camera or stand still for more than half a second.  


I also wanted a card that was simple and classy.  These family photos were taken in Cancun and helped set the tone for our card.  I wanted the colors to stand out so I stuck with three basic colors: white, blue, and brown.  I really love the colors and the fun effect I used on the photos (thanks picasa). I haven't been a big fan of google's picasa but they have made some huge upgrades to usability lately.  Even a dummy like me is able to figure it [mostly] out.


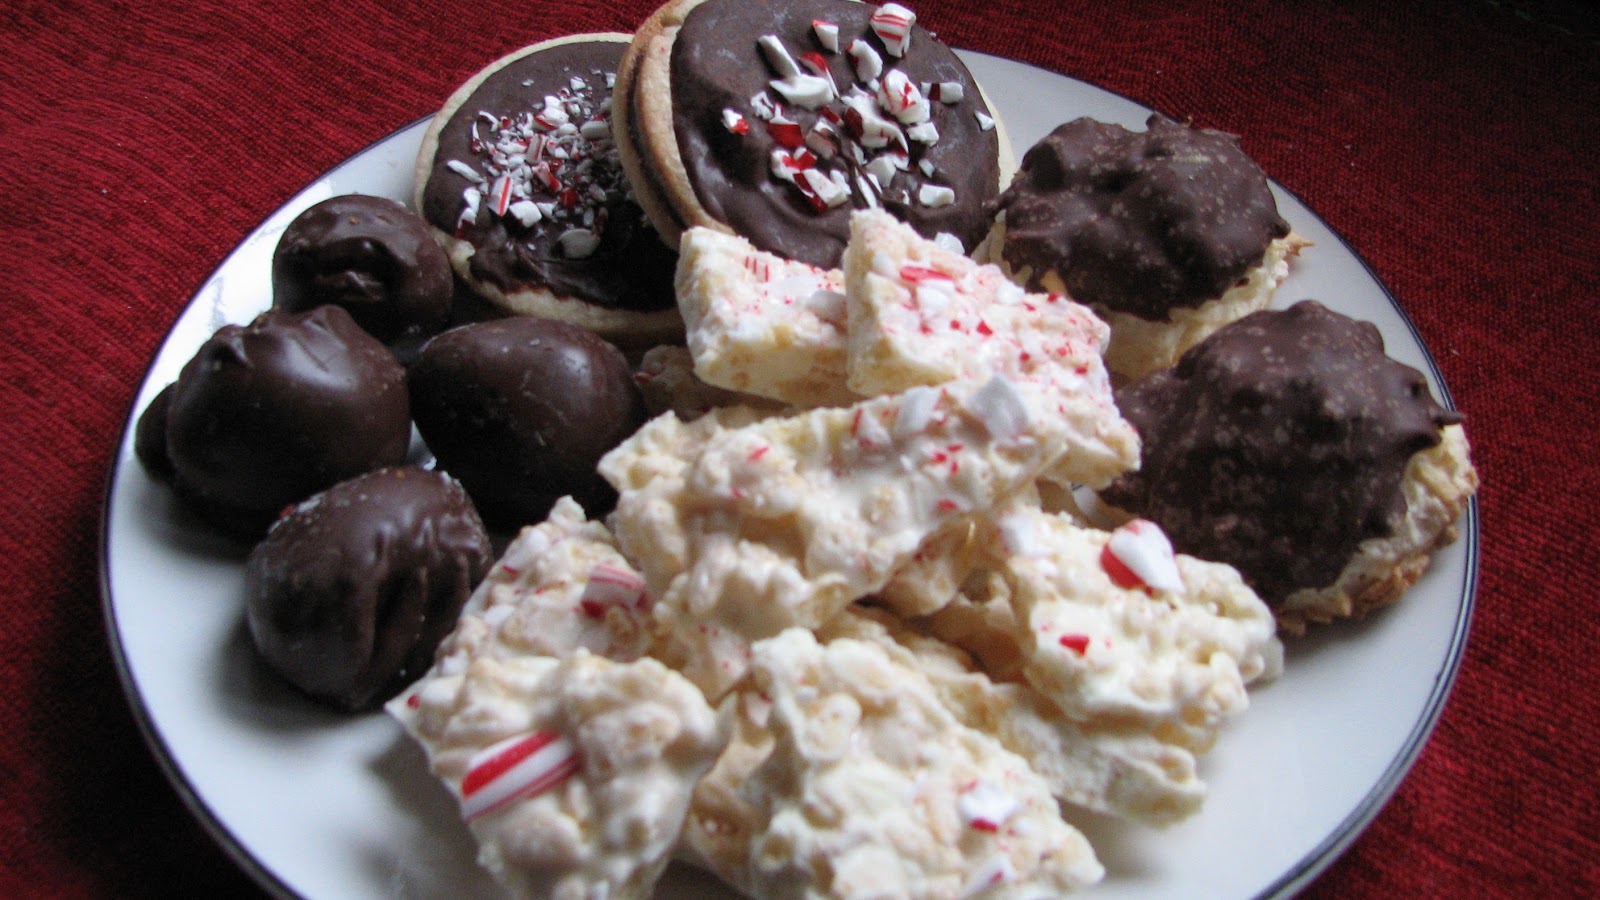
Here is a plate full of candy that I made this year.  Actually, this is the same candy I make every year.  Going clockwise starting at the top (12 o'clock) is: Chocolate Peppermint Cookies.  The link will take you to Sandra Lee's original recipe.  I modify the recipe by making my own sugar cookies (find a recipe you like) and I make the cookies much smaller than recommended.  The cookies are very rich so I have found that using a two-inch cookie cutter for sizing is perfect.  I used a one-inch cookie cutter last year which resulted in much cuter cookies but much more work to make and bake.  Next candy:  Paradise Macaroons.  This recipe is from Alton Brown and these little babies taste just like an Almond Joy candy bar, REALLY.  They are delicious.  This year, I skipped the nuts (did you see nut prices this year!!! As my son would say, "wow-wee zowie").  Next up:  Peppermint Bark.  Oh Martha, how I love thee.  Don't change a thing, but be prepared to make double, triple, or quadruple batches because everyone will want some.  Last but not least:  Peanut Butter Balls.  This recipe from Taste of Home is always a hit but make these when well rested because these go on forever, you are not sure if you will finish dunking them in chocolate.  Make the balls small, like 1 inch because these are rich (but delicious). This recipe might even make more than 42 balls that it says (that rarely happens).  


Here are the cookies that Johnathan left out for Santa.  My son said Santa wanted chocolate milk (not white milk) with his cookies.  I don't think Santa was upset by the change.  


I was no where near as prepared as I had hoped this holiday season.  I had big plans to get a lot of gifts handmade for people this year but as always, time slipped away from me.  Not all was lost.  I did find time to make this ring pillow for my sister.


 It is made from the fabric from my own wedding dress (don't worry, I didn't cut my dress apart, I had some fabric scraps).  I think she really liked it. She also reciprocated and gave me the gift of standing up in her summer 2013 wedding!  How fun!

I hope you all had just as great of a year as our family did.  I hope 2012 brings all of us even more great times and laughs with each other, our families, and our friends.  Cheers!


Sunday, December 4, 2011

Holiday Sneak Peeks Take Two


 Hi Everyone.  I'm back with some more sneak peaks at all the fun gifts that we'll be making at my craft class this month.  Last time I showed you a quick shot of a project in progress.  It was an ornament made from clay.  I got the original idea from Heather Nichols blog: Pine is Here.  This was my take on her project.


The clay is really easy to work with.  I rolled it with a rolling pin to about a 1/4" thickness and used a bell shaped cookie cutter to cut out the shape.  I used my regular old black stamp pad and randomly stamped the snowflakes onto the bell.  The stamp left a really nice impression in the clay.  I baked it in the oven (as directed on the clay packaging).  Once cooled, I added a clear coating to the top.  I then adhered some holly leaves with glue dots to the back of the ornament and finished it with a pretty ribbon.  This could be used on a Christmas tree or used to adorn a wrapped gift.


This next project was so simple.  It is coasters for drinks made with pretty cardstock.  Just pick out any patterned paper you like {bonus if it is scrap}, mod podge it onto some bath tiles that are 16 cents each at the home improvement store, glue felt feet on the bottoms and call this project DONE...well......

...almost done.  Of course you need to wrap them with a pretty bow and a handmade gift card to finish the gift.


Here is a gift box made from a template I purchased at My Time My Creations.  It is large enough to fit a large glass jar candle.  I plan on putting a coffee mug with coffee, creamer and treats inside.


I woke up the other night with this idea that I thought was brilliant.  I would make a treat holder that was in the shape of Santa's pants.  This idea literally got me out of bed bright and early, I thought it was genius and would make me famous.  Well, a 30 second search on the internet told me that I certainly wasn't the first to come up with this cute idea.  Oh well.  Still cute anyway.  Here is my version.  It is made with a simple 2-4-6-8 box template, you can find the directions for a 2-4-6-8 box all over the web.  I can't wait to fill 'er up with candy.

 
Here is a quick and simple gift jar.  I'm thinking of filling this with some homemade bath snowballs from Martha Stewart, say what you want about her but she is one creative goddess in my book.

  
 Last but not least:  my favorite project this month {hands down} is this holiday card storage box.  I've been wanting to make one of these for a few years now and when I saw this paper pack at Michael's today it was all mine.  I really had grand schemes to decorate this but the paper is so pretty there really is no need.  Love it. Just cut the paper to size and mod podge it in place.  I used the lid on the bottom because I thought it provided a nice decorative detail.  I have already received several cards in the mail and can't wait to put them in here.  Perhaps I should think about finishing my own....maybe another day :)

I hope you have found a lot of holiday inspiration in my last two posts.  I'm wiped out and I'm nowhere near having any of my personal projects completed.  I'm starting to fall behind but I have high hopes for what I can get accomplished this week, I hope you all do too. 

Sunday, November 27, 2011

Holiday Sneak Peeks


Hi Everyone.  Are you all sick of turkey yet?  I've said it before but I will say it again, I LOVE this time of year.  It was been one productive weekend for this family.  We got the tree up and decorated and surprisingly my son enjoyed helping with the lights and ornaments. 


It is hard to believe but this tree only cost us $15 and it is PERFECT.  There isn't a thing wrong with it.  It is so perfect in fact, that my husband is convinced it will be dead before Christmas (because he can't find anything else wrong with it).  That happened once when I was growing up, our tree died before Christmas came but my mom and dad made the best of it by making a Christmas tree out of strings of lights on our wall.  Christmas wasn't ruined then and it won't be ruined now.  I'm hoping when Santa comes to drop off presents this year that he finds time to patch all those holes in my walls....I have my doubts.


My husband has been working hard this weekend so I rewarded him with some pumpkin cheesecake made in muffin cups. I made up the recipe after I couldn't find one that I liked on the web.  I put a Nilla Waffer on the bottom of each cup and filled them with a cream cheese layer and a pumpkin layer and swirled the layers with a toothpick.  They tasted delicious but a graham cracker crust would have tasted better...or a ginger snap bottom would have been great. 

Of course I found a few minutes (wink) to work on some crafts.  I did a little bit of this and a little bit of that.  I'm working on planning my favorite card class of the year.  The December card class has traditionally become the month where we make small gifts for others.  This year is no exception.  Here are a few sneak peaks of what I have planned for those that attend.


Here is a cute way to gift hot cocoa to someone in your life.  I cut off the top of a clear box and used tacky tape to line it up with ribbon.  I added this die cut snowflake to the outside.  Inside the box you will find fixings for a great cup of cocoa including Starbucks hot chocolate, a bag of marshmallows, and a candy cane.  This makes a simple and inexpensive gift for a teacher, coworker, or friend.


This next sneak peak is a beautiful gift card holder.  I really love this.  I like most things that I make but this item I just really love.  It is so pretty.  I used grey cardstock as the base.  The poinsettia is made with vellum paper.  It is a simple and beautiful way to give way a gift card.


I'm also working on a clay ornament as well but I don't have all the details of this gift worked out yet.  A quick picture of it {in progress} is at the top of this post.

I hope you love my sneak peaks.  I hope you love them so much you will think about checking out my etsy shop: Furloughed Time and possibly buy them because this weekend I got my husband to agree to this crazy idea that I can buy an ipad once I make enough money from my crafts (after accounting for expenses).  He agreed to this because he knows just how much I spend on my crafts each month but for those of you that know me, you know just how stubborn and determined I can be.  This situation is no exception.  I am determined to make this goal in 2012, it will be tough, but I am determined.

Tuesday, November 22, 2011

Less Stress


 I promised myself that this holiday season will be different then the last.  Last year I was so overwhelmed and stressed that by the time the holidays were over I felt exhausted and defeated by the whole season of giving.


I'm doing several things different this year in the hopes that I will have more time for family and friends and spend less time feeling anxious about what still needs to get done.  One of my solutions to creating a less stressed holiday season (notice I didn't say no stress) is to be better organized this year.  Is there a better way to feel more organized than with this cute little Holiday Planner?  I don't think it could be possible.


 This book will be my saving grace, the end to my stress filled fights with my hubby, my "little black book" with all the answers.  Maybe I can get it to wash the dishes for me too!  Now seriously folks, don't you just wish for once that life could become just a little bit easier?   I certainly do.  I guess that is what I'm hoping this Holiday Planner can do for me.


I made three A2 envelopes using the Martha Stewart's Scoring Board and cut off all but 1/2 inch on two of the flaps and left the third envelope whole.  I glued the flaps to the back side of each envelope and created an accordion fold out of the three envelopes.  I decorated the envelopes with patterned paper and die cut a few shapes to each.


There is an envelope for "to do" lists, "to buy" lists, and "to bake" lists.  Those are my essential categories during every holiday season.  Of course this is versatile enough to fit any need.  It conveniently fit inside a purse so I can easily travel with it EVERYWHERE.


If you love this as much as I do, let me make one for you!  Head on over to my etsy shop for details.


Thursday, November 3, 2011

Christmas Cards Already?

Sleigh Bells ring...are you listening.  Yeah, you know the holidays are right around the corner when local radio stations start playing their Christmas music.  While it might be a tad too early to start listening to Christmas music, it isn't too early to start crafting cards for the season.  

I have designed all my holiday cards for my card class to be held later this month and I got to tell you, it feels great to be ahead of the game for once. Here are five very different card ideas for this holiday season.


This cute little card is called "Season's Greetings".  This card is for those of you that appreciate simple design. The "season's greetings" is embossed with red glitter.  There is an image of a reindeer, penguin, and snowman all with a red accent.  The outside reads: "Season's Greetings".  The inside reads: "Wishing you the happiest of holidays filled with more joy & happiness than your heart can hold".


This card is called "Christmas Poinsettia".  Poinsettias are so pretty, I think this one is no exception. There is a lot of die cutting to this card but it creates a lovely finished look.  The outside reads:  "The best way to spread Christmas cheer is singing loud for all to hear".  The inside reads: "Wishing you the happiest of holidays".


This card is called "Sleigh Ride".  It features a cute winter scene.  There is glitter that lines the tip of the snowdrifts.  The outside reads:  "Sending Holiday Cheer".  The inside reads: "Have a very merry Christmas with family, friends & everyone you hold close to your heart".


 This card is called "Bold Snowflake".  It uses two die cut snowflakes laid on top of one another with every other tip being frosted with glass crystals.  The outside reads: "Sending Christmas Cheer. Dec. 25th. photo no."  The inside reads: "May the holiday season bring happiness & joy to you and your loved ones".


 This last card is titled, "Happy Holidays".  This is a tri-fold card that is perfect for displaying a family photo.  The outside reads "best wishes for a happy holiday and a wonderful new year".   The inside panel reads: "Merry Christmas" and gives you a space to write in the date of the picture.  The other inside panel reads: "Peace Joy & Love". Yet another inside panel reads: "Merry & bright. happy holidays. sweetest holiday wishes. love peace joy. believe".

All cards are made with Papertrey Ink Stamps.   The blank tri-fold cards can also be found on PTI's website.

Contact me if you are interested in buying some of these lovely little gems.

Wednesday, November 2, 2011

Halloween 2011


So another Halloween has come and gone.  My son went as a rocket man this year.  I made the costume from two liter soda bottles that were spray painted silver.  I used crepe paper as the "flames".  I saw the original idea on Pinterest via Sewing in No Man's Land.


 I love making his Halloween costumes each year.  I like this one because it isn't a licensed cartoon character that belongs to some else.  This one gets to the heart of imagination.  I can see him using this for dress up in the future.


Trick or Treat day was terrible rainy mess here in Wisconsin.  We attempted to take my son to Grandma and Grandpa's house but the weather was just not cooperating.  Grandma and Grandpa offered a better alternative, "Let's just take him to Wal-Mart and we'll buy him a big bag a candy and call it a day."  DONE, DONE, AND DONE.  When he went to the bathroom he pumpkin was filled with candy, when he saw all the candy his eyes nearly popped out of his hear, needless to say, he was one happy little boy.

Yeah, I know, going to a store and filling up is cheating, but it was 40 degrees outside and raining!  This is the first year we've been rained out.  I've had him dress up since he was a baby.  I've made all of his costumes so far.  Here are the others:


He was Charlie Brown (with a hat because it was really cold).  This was inspired by his bald head.  This was a no-sew outfit. I cut out the chevron strip from black felt and secured it to a cheap yellow sweatshirt using fusible web. Fusible web is a non-sewer's dream come true.  You just iron it on and it fuses the two fabrics together (probably not long term but for a Halloween costumes that will only get worn a couple of times, no problem).   


When he was one year's old, he went as a dinosaur. This one was inspired by his love for, duh... dinosaurs.  This was another no-sew outfit.  I used green scour pads, cut them in half and hot glued them onto his hat, vest, and tail.  The tail was made from a piece of brown felt.  The most expensive part of this outfit was the brown vest from Old Navy for $10 (double my normal clothing rule of $5) but it was really an essential piece of this outfit so I made an exception to my clothing rule.  


Last year, he went as an airplane.  I used a cardboard box for all the parts (and a red plastic cup for the propeller) and spray painted the whole thing silver.  I added two shoestrings to the top so he could keep the costume on but I got to tell you: he hated it.  For most of that day my sister walked around wearing the costume for him.


She makes a cute airplane, doesn't she?  People were really nice and understanding about the whole, "I'm two, I want candy, and no I won't wear a stupid costume for you."  Oh the joy of two year olds :)

---------------------------------------------------------

Well, we're on to a new month already, I don't know where the months go.  This is my favorite time of year.  I know you don't want to hear this but Christmas is only a short 7.5 weeks away and I am busy planning for the holidays.  We have a busy month in this household including our first family vacation and Johnathan's first airplane ride.  I'll be back in a few days with some more craft projects, until then:  find some time to craft!


Tuesday, October 25, 2011

PTI October Blog Hop


It is already the 25th of October!  Where do the months go?  I love the 25th of the month because that is Papertrey Ink's Blog Hop Day.  That's the day when they send out a photo for inspiration and we all come up with our twist on that photo.


As Nicole says, the picture has some autumn flair and I think I captured that flair with my paper version of these cute little fabric pumpkins.  I love these fabric pumpkins so much that I think I might buy the pattern on etsy to make later but until then, I have my paper version. 


These paper pumpkins are so easy to make.  All you do is cut several strips of paper, hole punch both ends, run ribbon through them and tie a knot on top so the pumpkins stay together.  This whole project came together in 30 minutes.  The paper needed for these is:  11 strips cut 1" by 8.5" (large), 11 strips cut 1" by 5.5" (medium), 10 strips cut .75" by 4".  Dawn has a great paper pumpkin tutorial on You Tube if you are a visual learner.  I used PTI's Leaf Prints stamp set and matching dies to create the leaves.  I used scrap paper and wrapped it around my finger to create the curly q's.

 I already had the felt acorns laying out for fall decoration and I  found some cute green polka dotted fabric in my stash (just like the inspiration photo).  Cute, huh?  If you want more info on making those cute little felt acorns, see my post, Throwing a Party in Style.


I love how I just added more fall decor to my home, thanks PTI for the inspiration!  I hope you have enjoyed my take on this month's PTI Blog Hop, I know I sure have. 


Sunday, October 23, 2011

Sweets and Treats


Halloween is just around the corner, are you ready?  My son sure is with his cape and batmobile.


He's not actually wearing this for Halloween but I couldn't resist taking some pictures when I saw the neighbors pull their car out of the garage (thanks D&D).

I love Halloween, it is such a fun time of year.  I love this time of year in general.  The weather is perfect. The leaves are changing. Everyone is gearing up for all the upcoming holidays.  October is also one of my favorite card classes to create.

 
First up is a cute little light up home decor item.  This project is easy.  I used Papertry Ink (PTI) dies that match the stamp set Halloween Treats & Sweets.  I used colored velum for the moon and bat wings.  I put a battery operated tea light candle in the inside (don't use a real one!). Quick and easy project that you can take to your office.   


Next up are these cute little Ghiradelli Chocolate holders.  I read a lot of blogs and sometimes I find projects that are so perfect that I can't think of anything that would improve upon the original design.  These were one of those types of projects.  For these I didn't stray too far from the original design by Nicole Heady.  So stinking cute, right?

 
Here is a cute spider made with another die that goes with PTI's Treats & Sweets.  The spider's body is made using circles folded in half and glued together.  The spider's web is made with plain white sewing thread.  The orange paper is embossed with a cuttlebug folder.


A cool black cat treat holder, tail and all.  The whiskers are all bent out of shape because my real cats kept eating them.  Be cool kitties, no new cats are walking on your turf.  This project will need to find a new home fast.  :)


Here are a couple other simple ways to hold your holiday treats using a small paper bag and another PTI die.  I used a piece of clear plastic on the inside of the pumpkin face so none of the treats would fall out (a great way to use the plastic sheets that the PTI stamps come on, I never throw those out).   


Have you noticed how mustaches are everywhere?  Super trendy.  People are wearing them on their clothes and jewelry.  Well I wanted to jump on that bandwagon, so here is my take (thank you pinterest).  Sucker stache.  A costume and treat all in one. Just find your favorite PDF of a mustache on the web, I used this one from The Inspired Bride.  Cut out on yellow, brown, and black cardstock and use a marker to create "hair".  Hole punch a small hole near the bottom and stick a sucker inside.  Super easy, super cute, and super trendy.


 Now this last item, a monster bookmark (again, thank you pinterst, I LOVE this site).   Cute, right?  Not my idea but I was happy to make my version of the original one that I found at Blogs.babble.

 See you soon, I'll be back with a blog all about homemade Halloween costumes.  Until then, HAPPY HALLOWEEN EVERYONE!